How to Make a Downstem: Complete DIY Guide 2025
Making a downstem requires specific materials, proper tools, and careful attention to safety protocols. This comprehensive guide covers everything from selecting the right glass tubing to achieving professional-grade results. Whether you’re a beginner or experienced crafter, these detailed instructions will help you create a functional and durable downstem that meets your specific requirements.
Essential Materials and Tools for Downstem Creation
Creating a quality downstem starts with gathering the right materials and tools. The most critical component is borosilicate glass tubing, which offers superior heat resistance and durability compared to standard glass. You’ll need tubing with an outer diameter of 12-14mm and wall thickness of 2-3mm for optimal strength. Professional-grade glass ensures your downstem can withstand repeated use and temperature changes without cracking or breaking.
Additional essential tools include a glass torch or burner capable of reaching temperatures above 2000°F, safety glasses rated for glassworking, heat-resistant gloves, and a graphite paddle for shaping. A glass scoring tool, diamond file, and proper ventilation system are also mandatory. Safety equipment cannot be compromised when working with high-temperature glass, as burns and cuts are serious risks without proper protection.
Choosing the Right Glass Type
Borosilicate glass remains the gold standard for downstem construction due to its low coefficient of expansion and exceptional thermal shock resistance. This glass type, containing at least 5% boric oxide, can handle rapid temperature changes that would shatter ordinary glass. Clear borosilicate tubing costs approximately $15-25 per foot from reputable suppliers, while colored varieties range from $20-40 per foot depending on the specific colorant used.
Professional Tool Requirements
A dual-fuel torch system using oxygen and propane provides the precise flame control necessary for quality glasswork. Budget-friendly options start around $200, while professional-grade torches can exceed $800. The torch must maintain consistent flame temperature and allow for fine adjustments during the heating process. Flame stability directly impacts the quality and consistency of your finished downstem.
Step-by-Step Downstem Manufacturing Process
Begin the downstem creation process by measuring and marking your glass tubing to the desired length, typically 3-6 inches depending on your specific application. Use a glass scoring tool to create a clean break line, then apply gentle pressure to snap the tube cleanly. Rough edges must be flame-polished immediately to prevent cuts and ensure smooth operation. The initial preparation sets the foundation for professional results.
Heat the glass tube slowly and evenly, rotating constantly to maintain uniform temperature distribution. The glass should reach a molten orange state before attempting any shaping or bending. Work in small sections, typically 1-2 inches at a time, to maintain control over the heating process. Controlled heating prevents stress fractures that could cause failure during use.
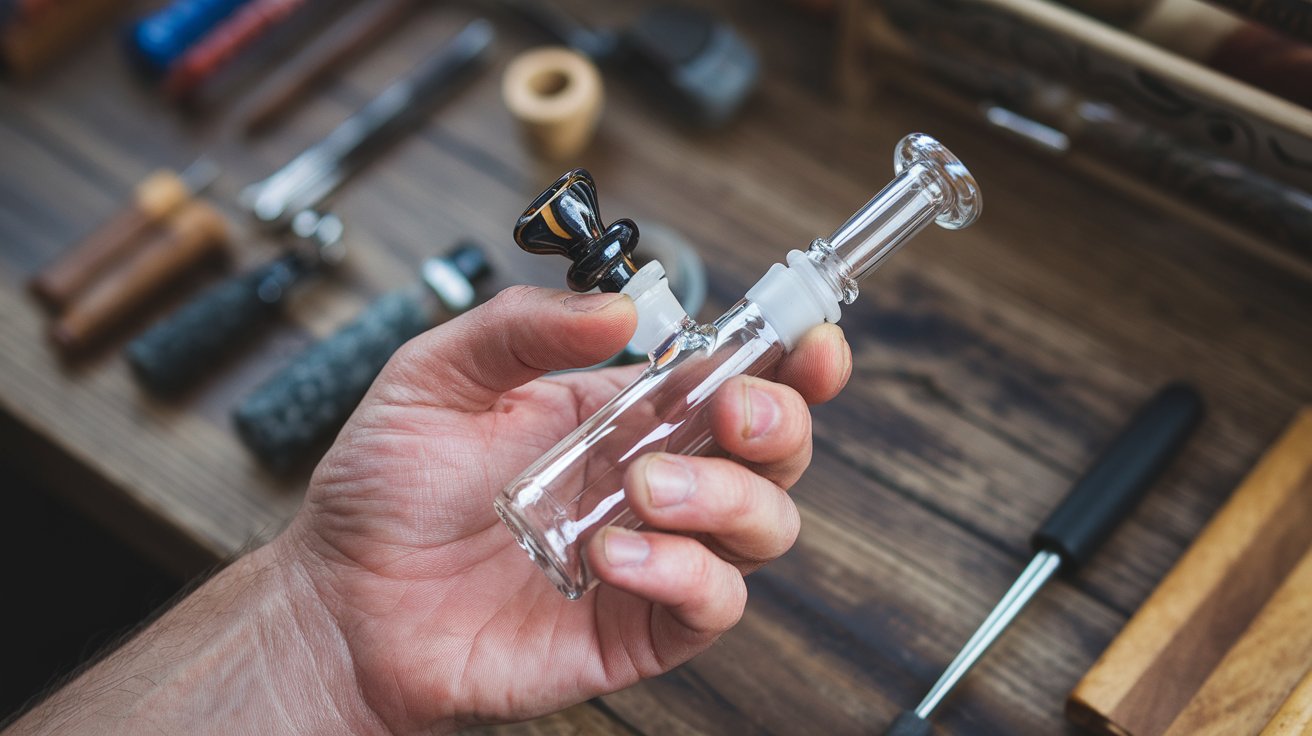
Creating the Bowl Connection
The bowl connection requires precise diameter expansion to accommodate standard bowl sizes. Heat approximately 1 inch of the tube end until molten, then use a graphite paddle or mandrel to gradually expand the opening. The standard bowl connection diameter measures 14mm inner diameter with a slight taper for secure fitting. Consistent wall thickness throughout the expansion prevents weak points that could lead to breakage.
Forming the Diffusion Holes
Diffusion holes significantly improve functionality by breaking up airflow and increasing surface area contact. Create 4-8 holes using a heated glass rod or specialized hole-punching tool, spacing them evenly around the circumference approximately 0.5 inches from the bottom. Each hole should measure 2-3mm in diameter for optimal airflow without compromising structural integrity. Proper hole placement ensures maximum diffusion efficiency while maintaining downstem strength.
Advanced Shaping and Design Techniques
Advanced downstem designs incorporate specialized features like percolation chambers, tree arms, or honeycomb patterns that enhance functionality. These modifications require additional skill and patience but result in superior performance characteristics. Tree arm downstems feature multiple branches extending from the main tube, each terminating in its own diffusion holes. Complex geometries demand precise heat control and steady hands to achieve professional results.
Creating curves or bends in your downstem requires careful temperature management and proper support during the cooling process. Use a graphite paddle to guide the bend while the glass remains workable, maintaining smooth curves without kinks or flat spots. Annealing stress relief becomes critical for bent downstems to prevent thermal shock failure during use.
Quality Control and Testing Procedures
Every finished downstem requires thorough inspection before use to ensure safety and functionality. Check for stress fractures using polarized light or by gently tapping the glass and listening for clear, bell-like tones. Cracked or stressed glass produces dull sounds and appears cloudy under polarized light. Visual inspection should reveal smooth, even surfaces without sharp edges or tool marks that could indicate manufacturing defects.
Functional testing involves checking airflow resistance and seal integrity with your intended application. The downstem should provide smooth, unrestricted airflow while maintaining proper fit tolerances. Pressure testing can reveal hairline cracks or weak joints that might not be visible during initial inspection. Any downstem failing quality control tests should be discarded rather than risked in service.
Common Mistakes and How to Avoid Them
The most frequent error in downstem manufacturing involves inadequate heating, leading to stress concentrations and eventual failure. Glass must reach full working temperature throughout its thickness before attempting any modifications. Rushing the heating process creates internal stresses that may not manifest as cracks until thermal cycling during use. Patient heating prevents 90% of structural failures in homemade downstems.
Improper annealing represents another critical mistake that compromises long-term durability. After completing all shaping operations, the entire downstem must be gradually cooled in a controlled manner to relieve thermal stresses. Professional annealing ovens provide ideal conditions, but careful flame annealing can achieve similar results for small pieces. Stress relief extends downstem lifespan from hours to years when performed correctly.
Temperature Control Issues
Maintaining consistent glass temperature throughout the working process challenges even experienced craftspeople. Hot spots create weak areas while cold spots resist shaping, leading to uneven wall thickness and stress concentrations. Use a rotating motion and move the flame continuously to ensure uniform heating. Even heating produces stronger, more reliable downstems that withstand regular use.
Safety Protocol Violations
Inadequate safety measures result in serious injuries and property damage during downstem creation. Never work without proper eye protection, as glass particles and intense light can cause permanent vision damage. Heat-resistant gloves prevent burns while proper ventilation removes harmful fumes and maintains breathable air quality. Safety compliance is non-negotiable when working with high-temperature glass and open flames.
Finishing and Polishing Techniques
Professional-quality downstem finishing requires flame polishing all cut edges and surfaces to eliminate sharp spots and improve aesthetics. Heat each edge until it begins to round and develop a glossy finish, rotating the piece to ensure complete coverage. This process also stress-relieves the glass surface, reducing the likelihood of crack initiation from surface imperfections. Flame polishing transforms rough, homemade appearance into professional-grade quality.
Final inspection should reveal completely smooth surfaces without tool marks, stress patterns, or optical distortions. The finished downstem should exhibit consistent wall thickness and proper dimensional accuracy for its intended application. Quality finishing not only improves appearance but also enhances safety by eliminating potential injury hazards from sharp edges or rough surfaces.
Maintenance and Longevity Tips
Proper downstem maintenance significantly extends service life and maintains optimal performance characteristics. Clean your downstem regularly using appropriate solvents and avoid thermal shock by allowing gradual temperature changes. Store downstems in padded containers to prevent impact damage, and inspect regularly for developing cracks or wear patterns. Preventive maintenance costs far less than replacement and ensures consistent performance.
Replace downstems immediately upon discovering any structural damage, as failed glass components can cause serious injuries. Keep spare downstems available to avoid extended downtime during cleaning or maintenance periods. Regular replacement maintains safety standards and optimal functionality throughout your downstem’s service life.
Related video about how to make a downstem
This video complements the article information with a practical visual demonstration.
Most asked questions about how to make a downstem
What type of glass should I use to make a downstem?
Borosilicate glass is the best choice for making downstems due to its superior heat resistance and low thermal expansion properties. This glass type can withstand rapid temperature changes without cracking and provides the durability needed for regular use. Standard borosilicate tubing with 2-3mm wall thickness offers the optimal balance of strength and workability.
How long does it take to make a downstem?
Creating a basic downstem typically takes 45-90 minutes for experienced glassworkers, including heating, shaping, and cooling time. Beginners may require 2-3 hours to complete their first downstem safely. Complex designs with multiple features can take several hours or multiple sessions to complete properly.
What safety equipment do I need for making downstems?
Essential safety equipment includes safety glasses rated for glassworking, heat-resistant gloves, proper ventilation, and flame-resistant clothing. A first aid kit and fire extinguisher should be readily available. Never attempt glassworking without complete safety protection, as burns and cuts can be severe.
Can I make a downstem without professional tools?
While basic downstems can be made with simpler equipment, professional results require proper tools including a glass torch, annealing equipment, and quality glass tubing. Attempting to make downstems with inadequate tools often results in poor quality, unsafe products that may fail during use.
How do I know if my homemade downstem is safe to use?
Safe downstems exhibit clear, stress-free glass with smooth edges and proper wall thickness. Test by gently tapping – quality glass produces a clear ring while cracked glass sounds dull. Inspect under good lighting for any visible cracks, stress patterns, or sharp edges before use.
What are common beginner mistakes when making downstems?
Common mistakes include inadequate heating leading to stress fractures, rushing the cooling process, creating uneven wall thickness, and skipping proper annealing. Poor safety practices and using incorrect glass types also frequently cause problems. Take time to learn proper techniques before attempting complex designs.
| Manufacturing Aspect | Key Requirements | Quality Benefit |
|---|---|---|
| Glass Selection | Borosilicate tubing, 2-3mm wall thickness | Superior heat resistance and durability |
| Temperature Control | Even heating above 2000°F with rotation | Prevents stress concentrations and failures |
| Safety Protocol | Complete protective equipment and ventilation | Prevents injuries and ensures safe operation |
| Quality Control | Thorough inspection and functional testing | Reliable performance and extended lifespan |